Archive
Clicker Bags by Annette
The following instructions are for the lined clicker bags that Annette showed at our October meeting. For more information about clicker bags (such as how to prepare the metal carpenters tape), refer to the bluebonnet clicker bag instructions. The length of the metal strips in Annette’s bags is 8″, and no interfacing is needed.
Self-lined bag (using the same fabric for the lining and outside):
- One piece of fabric 8.75″ by 27.5″
Construction:
- Fold the fabric in half, right sides together.
- Stitch around the open sides using 0.25″ seam allowance. Leave a 4″ hole for turning in the short side.
- Turn right side out and press.
- Close the hole using your preferred method (Steam-a-Seam, hand-stitching, etc).
- Tuck the fabric inside to create the pouch and press.
- Fold over the top of the bag 1.25″ and press. This will create the casing for the metal carpenters tape.
- Starting from a side seam, topstitch halfway along one side. Insert a tape strip.
- Continue topstitching most of the way around. Slide in the second tape strip, then finish stitching. You’re done!
Contrast fabric bag (using a different fabric for the lining):
- Outside fabric 8.75″ by 13.5″
- Lining fabric 8.75″ by 15″ (the longer size hides the seam under the casing)
- The lining will be visible on the outside as the casing for the metal tape
Construction:
- Place fabrics right sides together. Stitch both short sides using 0.25″ seam allowance.
- Pull the two pieces apart. Fold the lining and outside fabrics in half and match the seams for the short sides in the middle. Stitch both long sides using 0.25″ seam allowance. Leave a 4″ hole in the lining for turning.
- Turn right side out and press flat.
- Close the hole using your preferred method (Steam-a-Seam, hand-stitching, etc).
- Tuck the lining fabric inside the outside fabric to create the pouch. Press.
- Fold over the top of the bag 1.25″ and press. This will create the casing for the metal carpenters tape.
- Starting from a side seam, topstitch halfway along one side. Insert a tape strip.
- Continue topstitching most of the way around. Slide in the second tape strip, then finish stitching. You’re done!
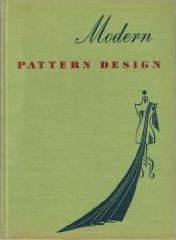
Free Download of “Modern Pattern Design”
Update: Many thanks to Kathy, who found another copy of the book! I’ve updated the links below per her info.
Are you interested in designing your own patterns? I found a free download of Modern Pattern Design: The Complete Guide to the Creation of Patterns as a Means of Designing Smart Wearing Apparel, by Harriet Pepin (1942). The PDF does not include the children’s section and “four instructions to be missing pants skirts, and even on each side” (?!). The last bit is Google’s less-than-clear translation from German.
By the way, I found out about the download from Off the Cuff. It’s a nice blog from the owner of Fashion Sewing Supply, and it has various sewing tips, techniques, tutorials, etc.

(Actually, the PDF has a different cover design, but I thought this one was prettier. ;-))
Craft Gossip
CraftGossip.com is a blog full of crafty goodness. It’s divided into sub-blogs (sewing being one) that are managed by separate editors. These editors “scour the net looking for the best craft ideas and projects and review them for you.” They have tons of stuff! It’s fun to browse through the site and see the different projects.
If you like giveaways, they have a tab dedicated to those, as well as a sister site (Craftbits.com) that also has giveaways. (To be honest, I don’t care for Craftbits because it doesn’t show project photos until you click on the project page. I don’t think that’s very browse-friendly, but that’s just me.)
Click the image below to check out the site!
